*We’re committed to transparency. Products marked with an asterisk were given to us to try by the brand. As always, all thoughts expressed on Rouge18 are our honest opinions.

About the Collection
ORLY’s Fall 2020 Desert Muse Collection was inspired by natural desert landscapes. Watch the sunset over the desert terrain with the warm clay and burgundy tones in this collection, and rest under the desert night sky with the cool-toned sage and blue hues. This collection features 6 crème polishes that are all 12-free. ORLY polishes are also vegan, cruelty-free, and Leaping Bunny certified.
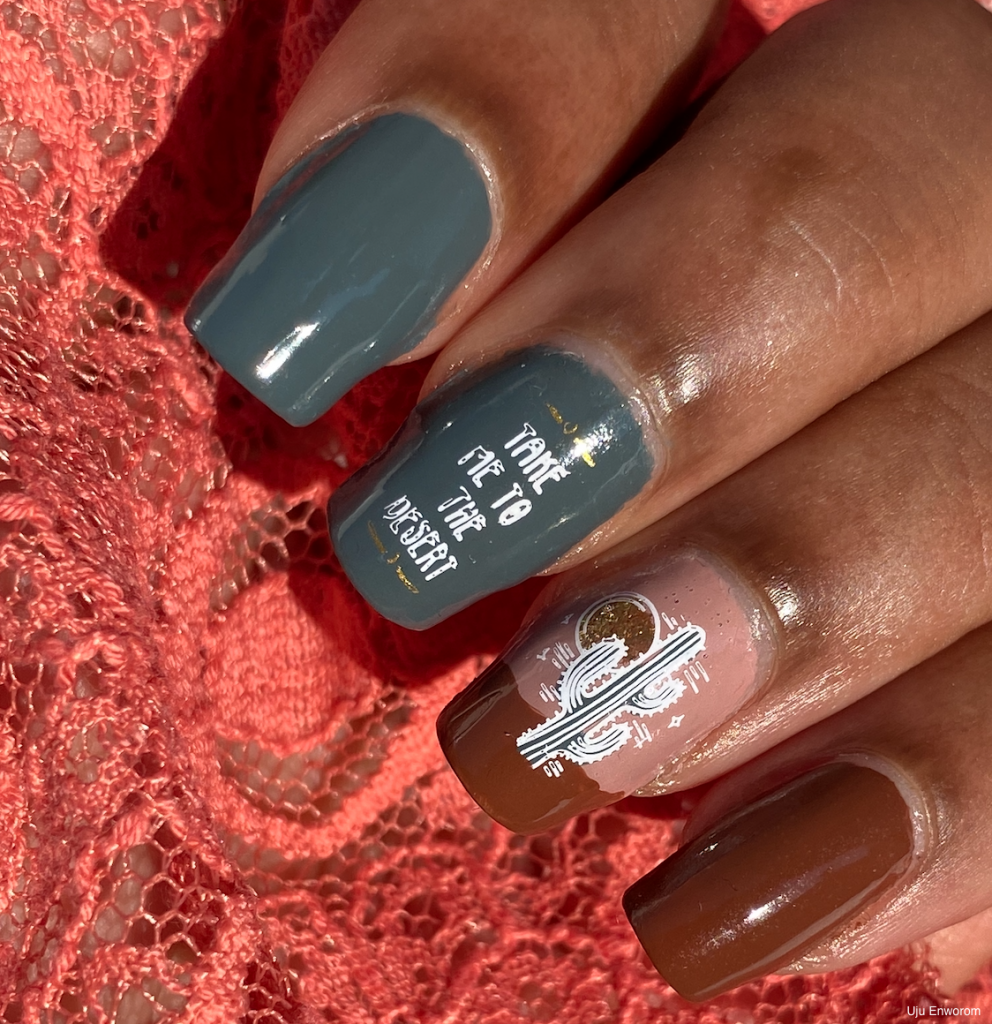
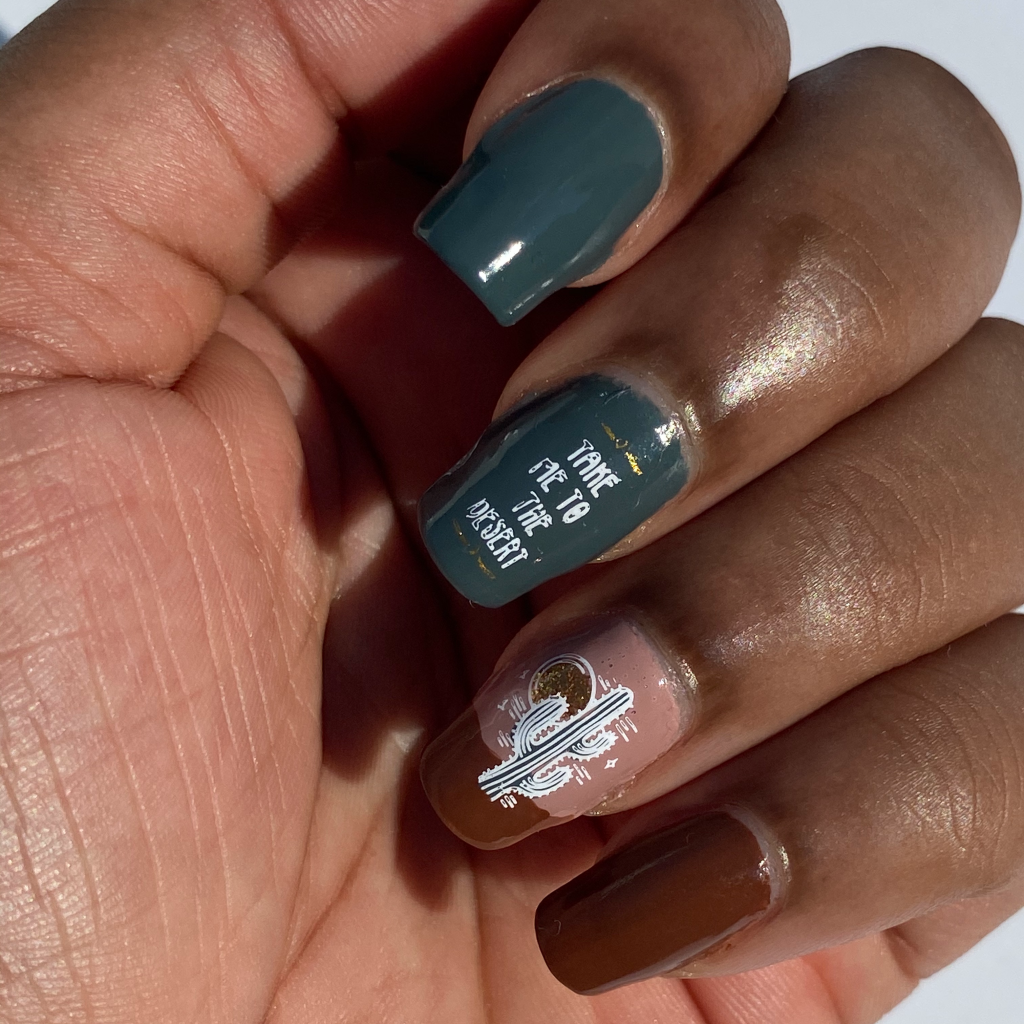
Inspired by this collection’s theme, I decided to create a desert-themed mani. Read on to see how I did it!

What You’ll Need
2. ORLY Bonder Rubberized Base Coat
3. *ORLY Nail Polish in “Sagebrush,” “Roam With Me,” and “Canyon Clay” from the Desert Muse Collection
4. Zoya Nail Polish in “Astrid”
5. Maniology MXM027 Stamping Plate (Mani x Me subscription required)
6. Maniology Ice Cube Stamper & Scraper
7. TwinkledT Stamping Polish in ‘Glow Up’
8. TwinkledT Stamping Polish in “So Extra”
10. Moyou London’s Smudge Resistant Premium Top Coat
I used nail stamping to achieve this look. For detailed explanations and video tutorials of nail stamping check out our In-Depth Guide to Nail Stamping.
How To
Step 1: Prep all nails with the Cuccio Dehydrator to remove any oils from the nail plate.
Step 2: Apply ORLY Bonder Rubberized Base Coat to all nails to extend the wear of your manicure.
Step 3: Apply 2 coats of ORLY Nail Polish in “Sagebrush” to your thumb, index finger, and middle finger.
Step 4: Apply 2 coats of ORLY Nail Polish in “Roam With Me” to your ring finger. Apply a strip of ORLY Nail Polish in “Canyon Clay” to the tip of the nail.
Step 5: Apply 2 coats of ORLY Nail Polish in “Canyon Clay” to your pinky finger.
Step 6: On your middle finger, use the Maniology MXM027 Stamping Plate, Maniology Ice Cube Stamper & Scraper, and TwinkledT Stamping Polish in ‘Glow Up’ to stamp “Take Me To The Desert” on the center of the nail. Stamp the horizontal line embellishments above and under this message using TwinkledT Stamping Polish in “So Extra”.
Step 7: Use the reverse stamping technique to create the cactus image. First, pick up the image from the Maniology MXM027 Stamping Plate using the Maniology Ice Cube Stamper & Scraper and TwinkledT Stamping Polish in ‘Glow Up’. Then, fill in the cactus with ORLY Nail Polish in “Sagebrush” and, fill in the sun with Zoya Nail Polish in “Astrid”. Allow the stamp to dry.
Step 8: Apply a thin layer of Maniology Sticky Base Coat to your ring finger and let it sit for 30-45 seconds until tacky.
Step 9: Apply the cactus stamp you created in Step 7 to the center of your ring finger.
Step 10: Apply Moyou London’s Smudge Resistant Premium Top Coat to your middle and ring finger, to prevent your stamping designs from smearing in the next step.
Step 11: Apply ORLY Won’t Chip Top Coat to all nails to seal in your manicure.
The Final Look

Can’t get enough? Check out more Rouge18 nail stories here!


Pingback: Popular Beauty Sites Including Personal Style & Makeup – Shopping & Retail